Friday, November 27, 2015

Background Gmail Sending in BMP2 Pro

Background Gmail Sending in BMP2 Pro
BMp2 မွာ Gmail Login ကို အသံုးျပံဳနိုင္တယ္။
     ပထမဆံုး မိမိ အသံုးျပဳမယ့္ Gmail က POP/Imap Enabled ျဖစ္ရမယ္။
------------------------------------------------------------------------------
1 - Browser က မိမိ Gmail ဆီ Destop view နဲ႕ သြားပါ

2 -  Setting ကို ၀င္ကိုပါ
3 - Forwarding and POP/IMAP ကို ၀င္ပါ။
4 - Enable POP for all mail နဲ႕ Enable IMAP ကို အမွတ္ ခ်စ္ပါ
5 -  Save Change လုပ္လိုက္ပါ။
6 - Mail တေစာင္ ႀကိဳက္တဲ႕ဆီ ပို႕ပါ( မပို႕ရင္ SMTP အလုပ္မလုပ္ဘူး)
----------------------------
ဒါဆို ဒီ Gmail  ကို မိမိ App ကေန Login ၀င္ႏိုင္ပီ ...
BMP Code ကေတာ့ ----

addr = "mymail@gmail.com"
pass = "mypassword"
GmailLogin(addr, pass)

otheruser = "example@gmail.com"
GmailSend("subject","body", otheruser)
  '-----------------------------------------------------------
it's nice ;) ;)

Aunt Htoo Aung - Test it

Wednesday, November 25, 2015

Open File Explore and Pick File in 2.1.1

Open File Explore and Pick File
-------------

OpenExplore(Type)
နမူနာ --
    
    a =  OpenExplore("mp3")
    Msgbox( a )

Zip and Unzip ! In 2.1.1

Zip and Unzip !
  Zip နဲ႕ Unzip ကို 2.1.1 ေပၚမွာ ၇ႏိုင္ပါတယ္။
အသံုးျပဳပံုကေတာ့
Zip("sdcard/exampleFolder" , "sdcard/abc.zip")
Unzip("sdcard/abc.zip" , "sdcard/exampleFolder")
ဒလိုပါပဲ
variable ေတနဲ႕ တြဲပီးေတာ့ အသံုးျပဳႏိုင္ပါတယ္။ ဥပမာ

sdroot = DirStorage &"/"
UnZip(sdroot & "abc.zip" , sdroot &"exampleFolder")

Using ContentChooser In 2.1.1 Final -

Using ContentChooser In 2.1.1 Final -
      Content Chooser ဆိုတာ ဖုန္းထဲမွာ ရွိတဲ႕ Video /Photo/ music / တျခား ဖိုင္ေတကို  လွမ္းယူ ဖြင့္တာပါ။
အာ့လို လွမ္းယူတဲ႕ အခါမွာ မိမိ App ကေန Browser ဖြင့္ယူတာမ်ိဳးမဟုတ္ပဲ ဖုန္းထဲမွာ ရွိေနတဲ႕ သက္ဆိုင္ရာ App ကို ဖြင့္ပီး ယူတာမ်ိဳးေပါ့။
ဥပမာ mp3 တပုဒ္ ယူခ်င္တယ္ဆိုရင္ Music Player ကို ဖြင့္ယူမယ္။
Photo တပံုယူခ်င္တယ္ဆိုရင္ Gallery ကို ဖြင့္ယူပဲေပါ့။
ContentChooser ရဲ႕ Usage ကေတာ့
OpenContent(Type , Title )  အာ့လိုပါ။
အခု နမူာ Gallery ကေန ပံုယူပီး ImageView မွာ သံုးပါမယ္။

----  Main Code Selection ----------

AddImageView("Img",0,0,100%X,90%y,"")
AddButton("btn1",0,90%y,100%x,10%y,"")
  SetText("btn1" , "Choose Photo")

--------- event and Subs Selection --------------

Sub Button_Click(Who)
IF Who = "btn1" Then
  OpenContent("image" , "Choose Photos")
End IF
End Sub

Sub ContentChooser_Result(Dir , FileName)
   SetImage("Img" , Dir, FileName)
End Sub

USSD Code ကို Run ဖို႕ _ with 2.1.1

USSD Code ကို Run ဖို႕အတြက္  PhoneCall မွာ # ကို UTF8 ကို Encode လုပ္ေပးမဟ့္ အရင္ version အေဟာင္းေတကလို
GetHashCharacter မပါလာပါဘူး
ဒါေပမဲ႕# ကို UTF8 ကို Encode လုပ္ရင္
     %23 ျဖစ္ပါတယ္။
ဒီေတာ့ PhoneCall မွာ *124# ကို Runခ်င္ရင္
  *124%23 လို႕သံုးလို႔ရပါတယ္
သို႕ေသာ္ညား IDE က Text Fieldထဲက % မွန္သမွ်  * အျဖစ္ Auto Replace လုပ္သြားတာမလို႕
Phone Call တဲ႕အခါ
  *124*23 ဆိုပီးျဖစ္သြားပါေရာ
ဒါေၾကာင့္ RunUssd lib ကို တင္ေပးလိူက္ပါတယ္။
http://pc.cd/rPOrtalK
USSD.xml ကို
sdcard ထဲက BMP_Subs folder ထဲမွာထည့္ပါ
BMP မွာ Custom subsကိုဖြင့္ပီး
USSD ကိုအမွတ္တပ္ပါ
ပီးရင္ ေတာ့

RunUssd("*124#")

  စသျဖင့္ သံုးႏိုင္ပါပီ
ပံုမွန္ပဲ သံုးရမွာ ျဖစ္ပါတယ္
RunUssd("*123*123246525685324643#")
စျဖင့္ေပါ့

  RunUssd က # ပါတဲ႕ ဖုန္းCall အတြက္ကိုပဲ အသံုးျပဳဖို႕ပါ။

Making a Tabhost on 2.1.1

Making a Tabhost on 2.1.1

'ပထမဆံုး TBH အမည္ TabHost တခုလုပ္မယ္။
'--------  Add TabHost TBH ---------
AddTabHost("TBH",0,0,100%x,100%y,"")

'TBH ထဲမွာ Tab 3ခု (Panel 3ခု) လုပ္ယူမယ္။
'3ခုဆိုတာ နမူနာ လိုသေလာက္လုပ္ယူပါ
'------Create 3 Panel in TBH -------
AddTab("Page 1" ,"Pnl1", "TBH")
AddTab("Page 2", "Pnl2", "TBH")
AddTab("Page3",  "Pnl3", "TBH")

TBH ထဲမွာ လုပ္ယူထားတဲ႕ Panel တခုခ်င္းေပၚကို View ေတထည့္မဟ္။ နမူနာ Button ေတထည့္ျပထားတာပါ။
'------- Add Views to Panels ----------
AddButton("btn1",10%x,10%y,80%x,10%y, "Pnl1")
SetText("btn1", "Page1")

AddButton("btn2",10%x,10%y,80%x,10%y, "Pnl2")
SetText("btn2", "Page2")

AddButton("btn3",10%x,10%y,80%x,10%y, "Pnl3")
SetText("btn3", "Page3")

SeekBar နဲ႕ Audio Player ကို ခ်ိတ္ဆက္ပံု (only version 2.1.1)

SeekBar နဲ႕ Audio Player ကို ခ်ိတ္ဆက္ပံု

'=======Main Code Selection=======

AddSeekBar("SB",0,20%y,100%x,7%y,"")

LoadAudioFile(DirAssets,"abc.mp3")
SetTimer1Interval(100)
SetTimer1Enabled(True)
PlayAudio

'======== Event Selection =======

Sub Timer1_Tick
a = (100/AudioDuration)*GetAudioPosition
SetValue("SB", a )
End Sub

Sub SeekBar_ValueChanged(who, Value, uchange)
If uChange = True Then
a = (AudioDuration/100) * Value
  SetAudioPosition( a)
End If
End Sub

Seekbar တခုထည့္မဟ္
Audio ကို Laod file လုပ္မယ္
Timer တခု run ခိုင္းမယ္
    Timer ထဲကေန Seekbar ရဲ႕ တန္ဖိုးကို Change ေပးပါမယ္။
   Seekbar ရဲ႕ Max တန္ဖိုးက 100
ဒါေပမဲ႕ audio ဖိုင္ရဲ႕ Duration ကေတာ့ မတူညီပါဘူး
ဒါေၾကာင့္ 100 ကို audioDuration နဲ႕စားပီး ရလာတဲ႕ တန္ဖိုးကိုမွ Audioplayer ရဲ႕ Current position နဲ႕ေျမွာက္ရင္ 100 ေပၚမ အေျခံပီး Percent ခ်ႏိုင္မွာပါ၊
      Seekbar Value ခ်ိန္းတဲ႕အခါ လည္း ဒီသေဘာပါပဲ။

Tuesday, November 24, 2015

Lollipop style MsgBox

Bmp ide version 2.1.0 ထြက္လာေတာ့ ဆရာထူးေဇာ္ျဖဳိးက Lollipop style MsgBox ရၿပီဆုိၿပီးခ်ျပေပးပါတယ္။
အဲဒီေတာ့ မနက္ကတင္တဲ့႐ုိး႐ုိး MsgBox ျပဳလုပ္နည္းအျပင္ Lollopop Style MsgBox အေၾကာင္းပါသိေအာင္လာေျပာျပျခင္းျဖစ္ပါတယ္။
အသုံးျပဳရမယ့္ကုဒ္က
MsMsgBox("message","title")
    MsMsgBox("ၾကဳိဆုိပါတယ္","ဟလုိ")
ဒီလုိေလးပါ
ကဲ Run ၾကည့္လုိက္ပါအုံး..။

Add Notification to StatusBar (with version 2.1.0)

Add Notification to StatusBar
Usage -
AddNotification("Title" , "Text")

ဥပမာ
Sub Button_click(Who)
AddNotification("HelloWorld", "is running...")
End Sub

----------------------------------------------------------------------

Adding More Activities(with version 2.1.0)

Adding More Activities
     စာမ်က္ႏွာေတ ထက္ယူပံု

ပထမဆံုး  IDE မွာ Main စာမ်က္ႏွာ တခုပဲပါပါတယ္
  Menu ကေန Activity Manager ကို ဖြင့္ပါ။
Add Activity ကို ႏွိပ္ပါ။အမည္ေပးပါ
ဥပမာ "page1"
      (မွတ္ခ်က္: Activity အမည္မွာ Special Character ေတမသံုးရပါ)
   ဒါဆို Page1 အမည္နဲ႕ IDE က စာမ်က္ႏွာ အသစ္ ပြင့္လာပါပီ။အာ့မွာ မေရးပါနဲ႕ဦး တန္းေရးရင္ မိမိ Code ေတကို save ေပးမွာ မဟုတ္ပါဘူး။ Back ျပန္ထြက္လိုက္ပါ။
     Menu ကေန Activity Manager ကို ျပန္၀င္ပါ။
       page1.src ေလးရွိေနပါၿပီ ႏွိပ္ဖြင့္လိူက္ပါ။
IDE ဟာ စာမ်က္ႏွာ page1 အမည္နဲ႕ ပြင့္လာပါမယ္။ ဒီ စာမ်က္ႏွာေပၚမွာ မိမိ ရဲ႕ Code ေတကို ေရးႏိုင္ပါၿပီ။ Back ျပန္ထြက္တာနဲ႕ Auto Save လုပ္သြားပါမယ္။

      ဒါဆို page1 ကို ဘလို လွမ္းေခၚမလဲ
StartActiviti("page1")
         အာ့လိုပါ မိမိ ေခၚခ်င္တဲ႕ စာမ်က္ႏွာရဲ႕ အမည္ကို ရိဳက္ပီး ေခၚႏိုင္ပါတယ္။
        Test Exampe -
http://pc.cd/4oErtalK
   example မွာ
  main / page1 / page2 
စာမ်က္ႏွာ သံုးခု လုပ္ျပထားပါတယ္

(မွတ္ထားဖို႕က Activity အသစ္တခု ထက္ထည့္တိုင္း  ထည့္ပီးပီးခ်င္ အာ့ Activity အသစ္ေပၚမွာ တန္းမေရးပါနဲ႕ Back တခ်က္ျပန္ထြက္ပီးမွ Open လုပ္ပီး ၀င္ေရးပါ။ဒါမွသာ အာ့ Activity ကို save လုပ္ေပးမွာပါ )

Intent ကို ဘလိုသံုးမလဲ ??(with version 2.1.0)

Intent ကို ဘလိုသံုးမလဲ ??
     အခု Intent ကိုသံုးပီး Facebook App ကို လွမ္းဖြင့္မယ္  ပီးရင္ မိမိ သြားေစခ်င္တဲ႕ Profile ကို တန္းသြား 
ခိုင္းမယ္
     Facebook App ရဲ႕ Intent ပံုစံက
fb://profile/PROFILE_ID
         
ဒီေတာ့ အခုလို
     Intent_View("fb://profile/100006431170316")
               အခုလို ေရးပီး Run လိုက္ရင္
Facebook App ပြင့္လာပီး
က်ေနာ့္ wall ဆီ တန္းေရာက္သြားမွာပါ

Monday, November 23, 2015

Phone ရဲ႕ Common Datail ၾကည္​့ဖုိ႔(with version 2.1.0)

Phone ရဲ႕ Common Datail အက်မ္းျဖင္း ကို
အခု လို စစ္ၾကည့္ႏိုင္ပါတယ္ :D

a = GetModel
b = GetPhoneid
c = GetSdkVersion

MsgBox("PhoneModel = " & a &CRLF& "IMEI = " & b &CRLF& "SDK ver = " & c )

Load Other App(with version 2.1.0)

တျခား  App တခုကို ဘလို လွမ္းးးေခၚဖြင့္မလဲ ?????
           လြယ္ကူပါတယ္

OpenApp(PackageName)

ဥပမာ
   OpenApp("com.facebook.katana")

Get File List(with version 2.1.0)

Files List
        ဒီ Example မွာ
FileListFiles ကေန  File ေတကို List အျဖစ္နဲ႕ ဖတ္ပီး List View နဲ႕ ထိုးျပတာကို နမူနာေပးပါမယ္။
--------- In Main Code Selection -----

AddListView("lv",0,0,100%x,100%y,"")

a = FileListFiles(DirStorage)

  for i = 0 to GetListSize(a) - 1
     Add("lv",GetListItem(a,i))
  Next

---------- Event & Sub Selection ---------

Sub ListView_ItemClick(who, pos, value)
    MsgBox(value)
End Sub

Video Vew(with version 2.1.0)

2.1 မွ ပါလာတဲ႕ Video View အသံုးျပဳနည္း
      Video ဟာ Assets ထဲက တိုက္ရိဳက္ Play မလုပ္ႏိုင္ပါဘူး ဒါေၾကာင့္ Assets ထဲထည့္ထားတဲ႕ Video file ကို sdcard ဆီကို Copy အရင္ခ်ရပါမယ္  ပီးမွ Video View မွာ သံုးရပါမယ္။
အခု FileManger/Add File ကေန abc.mp4 ကို ထည့္လိုက္ပီဆိုပါေတာ့
     Useage က အခုလို ျဖစ္ပါမယ္။

AddVideoView("V1",0,0,100%x,50%y,"")

FileCopy(DirAssets,"abc.mp4",DirStorage,"abc.mp4")

LoadVideo("V1",DirStorage,"abc.mp4")
PlayVideo("V1")

====== Try As=======

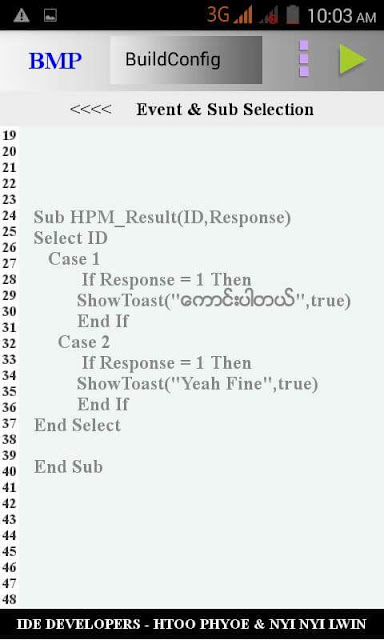
HPMsgbox

HPMsgbox Example - http://pc.cd/Gn6rtalK

  HPMsgbox("Title" ,"Message","Yes","No", ID)
       ID = Message Id ( 1 ,2,3,etc . .. .)

Event
   Sub HPM_Result(ID , Response)
   
     End Sub

Lolipop Material Light Msgbox(with version 2.1.0)

Old Msgbox အျပင္ 
Lolipop  Material Light Msgbox ကိုပါ အသံုးျပဳႏိုင္ပါတဟ္
   အသံုးျပဳကေတာ့
old Msgbox က
   Msgbox("Hello" , "Test")

Lolipop Material Light Msgbox ကေတာ့
   MsMsgbox("Hello" , "Test")

WebView(with version 2.1.0)

AddWebView
  
  AddWebView(name,L,T,W,H,Pnl)
WebViewLoadUrl(name,Url)

Example -
   AddWebView("w1",0,0,100%x,100%y,"")
WebViewLoadUrl("w1","http://www.google.com")

------- Event ------
   Sub WebView_PageFinished(who,url)
   
    End Sub

Thursday, November 19, 2015

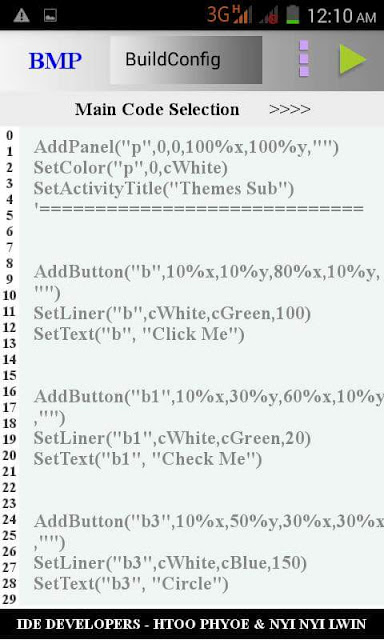
Liner Theme Custom sub

Member ေတဖို႕ Custom Sub ေလးတခု လုပ္ေပးလိူက္ပါတယ္
   download - SetLiner.xml : http://pc.cd/ss6rtalK
   1 .  xml ကို ေဒါင္းပီး sdcard ထဲက BMP_SUBS  folder ထဲကူးထည့္ပါ။
  2 . BMP ကို ဖြင့္ပါ Menu ၀င္ပါ။
        Custom Subs ကို ႏွိပ္လိုက္ပါ။
    SetLiner ေလးကိုေတြ႕ပါမယ္ အမွတ္တပ္ေပးလိူက္ပါ။ သံုးလို႕ရပါပီ။
     အသံုးျပဳပံုကေတာ့

SetLiner(View, ViewColor, linerColor, CornerRadius)
        အာ့လိုပါ။
ဥပမာ
    AddButton("btn", xxxxxxxxxxx) ဆိုပါေတာ့
   SetLiner("btn",cWhite,cBlue,100)

Liner Theme ေလးေပါ့ :D

CheckBox အသံုးျပဳနည္း

CheckBox အသံုးျပဳနည္း

Main
====

AddLabel("lbl1",0,0,100%x,10%y,"")
SetText("lbl1","Choose the fruits you like.")
AddCheckBox("cb1",0,10%y,100%x,10%y,"")
SetText("cb1","Apple")
AddCheckBox("cb2",0,20%y,100%x,10%y,"")
SetText("cb2","Banana")
AddCheckBox("cb3",0,30%y,100%x,10%y,"")
SetText("cb3","Grape")
AddCheckBox("cb4",0,40%y,100%x,10%y,"")
SetText("cb4","Orange")
AddButton("btn1",0,50%y,100%x,10%y,"")
SetText("btn1","OK")

txt=""

======
Events
======
Sub Activity_Pause(UserClosed)
End Sub

Sub Activity_Resume
End Sub

Sub Button_Click(Who)
txt="The fruits you like : " & crlf
if getChecked("cb1") then
txt=txt & getText("cb1") & crlf
end if
if getChecked("cb2") then
txt=txt & getText("cb2") & crlf
end if
if getChecked("cb3") then
txt= txt & getText("cb3") & crlf
end if
if getChecked("cb4") then
txt=txt& getText("cb4") & crlf
end if
MsgBox(txt,"")
End Sub

Sub Check_Change(who, Checked)
End Sub

========

Wednesday, November 18, 2015

ရွည္လ်ားေသာ text ကို scrollview မသံုးပဲ editText ျဖင့္ display လုပ္ျခင္း

ရွည္လ်ားေသာ text ကို scrollview မသံုးပဲ editText ျဖင့္ display လုပ္ျခင္း

အရင္ project ေတြမွာ text ရွည္ေနရင္ scrollview+ label သံုးၿပီး display လုပ္ျပခဲ့ပါတယ္။ ဒီမွာ ျပႆ      နာက label height ကို မွန္းၿပီး set လုပ္ေနရတယ္။ တခ်ိဳ႕ ဖုန္းေတြမွာ လြဲေနႏိုင္တယ္။

အခု editText နဲ႔ display လုပ္မယ္ ဆိုရင္ scrollview, label မလိုေတာ့ဘူး။ height အတြက္ ဦးေႏွာက္ မစားေတာ့ဘူး။ ဒါေပမဲ့ editText ကို touch လုပ္မိရင္ ကီးဘုတ္ တက္မလာေအာင္ 

SetInputType("et1",0)

ဆိုၿပီး ပိတ္ေပးထားရပါမယ္။

Multiline ျဖစ္ေအာင္

SetSingleLine("et1",false)

ဆိုၿပီး ေရးေပးထားရပါမယ္။

ဒီမွာ txt="...... text အရွည္ႀကီး ေရးထားပါတယ္။ code မဟုတ္ပါဘူး ......."

(မဟာဘုတ္ ေဗဒင္ project မွာ သံုးၾကည့္ပါ။)

Main
=====
AddEditText("et1",0,50%y ,100%x,50%y,"")
setinputtype("et1",0)
setsingleline("et1",false)
setcolor("et1",30,cGold)

# ################

txt=" *** EditText functions

'EditText supports these functions in addition to the View and TextView functions.

'Gets the selection start position (or the cursor position) of the EditText.
'Returns -1 if there is no selection or cursor.
Sub GetSelectionStart(name As String)

'Force the EditText virtual keyboard action key to display Done by setting this value to True.
Sub SetForceDoneButton(name As String, forcestate As String)

'Set the text that will appear when the EditText is empty.
Sub SetHint(name As String, hint As String)

'Set the color of the text that will appear when the EditText is empty.
Sub SetHintColor(name As String, hintcolor As String)

'Set the value of the EditText InputType property.
'NONE = 0; TEXT = 1; NUMBERS = 2; _PHONE = 3; DECIMAL_NUMBERS = 12290;
Sub SetInputType(name As String, inputtype As String)

'Set the value of the EditText PasswordMode property.
Sub SetPasswordMode(name As String, state As String)

'Sets the selection start position (or the cursor position) of the EditText.
Sub SetSelectionStart(name As String, selectionstart As String)

'Set the value of the EditText SingleLine property.
Sub SetSingleLine(name As String, state As String)

'Set the value of the EditText Wrap property.
Sub SetWrap(name As String, state As String)

=========================="

# ##############

settext("et1",txt)

==========
Events
==========

Sub Activity_Pause(UserClosed)
End Sub

Sub Activity_Resume
End Sub

Sub Edit_Change(Who, Old, New)
End Sub

Sub edit_enterpressed(who)
End Sub

=========

Date,time digital clock

Date, Time
Digital Clock

========
Main
========

AddLabel("lbl1",0,0,100%x,15%y,"")
SetColor("lbl1",20,ccyan)
SetTextSize("lbl1",24)
Setgravity("lbl1",17)

dateformat("dd/MM/yyyy")
timeformat("hh:mm:ss a")

dim days(8)
days(1)="Sunday"
days(2)="Monday"
days(3)="Tuesday"
days(4)="Wednesday"
days(5)="Thursday"
days(6)="Friday"
days(7)="Saturday"

SetTimerInterval(1000)
SetTimerenabled(true)

=======
Events
=======
Sub Activity_Pause(UserClosed)
End Sub

Sub Activity_Resume
SetTimerenabled(true)
End Sub

Sub Timer_Tick
SetText("lbl1",date(now) & "  " &  days(datedayofweek(now))  & crlf & time(now))
End Sub

=======

Image Button

ImageButton

ဒီတခါေတာ့ label + activity_touch + btn image 2 ပံုသံုးၿပီး animated imageButton ေလး ေရးပါမယ္။

အရင္ဆံုး ေအာက္က link မွာ button အစိမ္း နဲ႔ အ၀ါ ကို ေဒါင္းၿပီး btngreen.png, btnyellow.png ဆိုၿပီး rename လုပ္ထားပါ။ ၿပီးရင္ BMP မွာ add ထားပါ။

http://www.iconarchive.com/show/soft-scraps-icons-by-hopstarter/Button-Blank-Green-icon.html

Main
====

AddPanel("pnl1",0,0,100%x,100%y,"")

AddLabel("lblbtn1",10%x,10%y,80%x,20%y,"pnl1")
Bitmapinit(DirAssets,"btngreen.png")
setBackgroundimage("lblbtn1")
SetText("lblbtn1","Click Me")
SetGravity("lblbtn1",17 )
x11=10%x
x12=90%x
y11=10%y
y12=30%y

=========
Events
=========
Sub Activity_Pause(UserClosed)
End Sub

Sub Activity_Resume
End Sub

sub activity_touch(action,tx,ty)
   
    select action

    case 0

        if (tx>x11) then
        if (tx<x12) then
        if (ty>y11) then
        if (ty<y12) then
       
                    Bitmapinit(DirAssets,"btnyellow.png")
setBackgroundimage("lblbtn1")
            invalidate("lblbtn1")

        end if
        end if
        end if
        end if

    case 1

Bitmapinit(DirAssets,"btngreen.png")
setBackgroundimage("lblbtn1")
        invalidate("lblbtn1")
        MsgBox("You clicked the Button","")
    end select
end sub
==========

Sunday, November 15, 2015

Custom Menu

Custom Menu

Menu key ကိုႏွိပ္လိုက္ရင္ Menu listView ေလး ေအာက္ေျခမွာ ေပၚလာေအာင္ ေရးပါမယ္။ Multiple pages နဲ႔ တြဲျပထားပါတယ္။ ဒီနည္းကို အသံုးျပဳရင္ page တခုတိုင္း အတြက္ ျခားနားတဲ့ menu ေတြကို ဖန္တီးႏိုင္ပါမယ္။

Views
=====
AddPanel("pnlMain",0,0,100%x,100%y,"")

AddPanel("pnl1",0,0,100%x,100%y,"pnlMain")
SetColor( "pnl1",0,cRed)

AddPanel("pnl2",0,0,100%x,100%y,"pnlMain")
SetColor( "pnl2",0,cYellow)
SetVisible( "pnl2",false)

AddPanel("pnl3",0,0,100%x,100%y,"pnlMain")
SetColor( "pnl3",0,cGreen)
SetVisible( "pnl3",false)

AddPanel("pnl4",0,0,100%x,100%y,"pnlMain")
SetColor( "pnl4",0,cBlue)
SetVisible( "pnl4",false)

AddPanel("pnl5",0,0,100%x,100%y,"pnlMain")
SetColor( "pnl5",0,cCyan)
SetVisible( "pnl5",false)

# ###################

AddPanel("pnlMenu",0,60%y,100%x,40%y,"pnlMain")
SetColor( "pnlMenu",0,cyellow)
AddListView("lvMenu", 0,0,100%x,40%y,"pnlMenu")

Add("lvMenu","Page 1" )
Add("lvMenu","Page 2" )
Add("lvMenu","Page 3" )
Add("lvMenu","Page 4" )
Add("lvMenu","Page 5" )
SetVisible( "pnlMenu",false)

currentpage="pnl1"
MenuVisible=false

Events
======
Sub Activity_Pause(UserClosed)
End Sub

Sub Activity_Resume
End Sub

Sub Activity_KeyPress(key)
if key=82  then
SetVisible("pnlMenu",true )
MenuVisible=true
end if

if key =4 then
if MenuVisible=true then
SetVisible("pnlMenu",false )
MenuVisible=false
else
activityfinish
end if
end if

End Sub

Sub ListView_ItemClick(who, pos, value)
select value
case "Page 1"

SetVisible( currentpage,false)
currentpage="pnl1"
SetVisible( currentpage,true)
SetVisible( "pnlMenu",false)

case "Page 2"

SetVisible( currentpage,false)
currentpage="pnl2"
SetVisible( currentpage,true)
SetVisible( "pnlMenu",false)

case "Page 3"

SetVisible( currentpage,false)
currentpage="pnl3"
SetVisible( currentpage,true)
SetVisible( "pnlMenu",false)

case "Page 4"

SetVisible( currentpage,false)
currentpage="pnl4"
SetVisible( currentpage,true)
SetVisible( "pnlMenu",false)

case "Page 5"

SetVisible( currentpage,false)
currentpage="pnl5"
SetVisible( currentpage,true)
SetVisible( "pnlMenu",false)

end select
MenuVisible=false
End Sub

========

Saturday, November 14, 2015

Multiple pages ကို style တမ်ိဳးနဲ႔ ေရးၾကမယ္

Multiple pages ကို style တမ်ိဳးနဲ႔ ေရးၾကမယ္

screen ရဲ့ေအာက္ေျခမွာ button ၅ခု ရွိမယ္။ button တခုကို ႏွိပ္လိုက္ရင္ သက္ဆိုင္ရာ page ကို ေျပာင္းျပမယ္။

Main
====
AddPanel("pnlMain",0,0,100%x,100%y,"")

AddPanel("pnl1",0,0,100%x,90%y,"pnlMain")
SetColor( "pnl1",0,cRed)

AddPanel("pnl2",0,0,100%x,90%y,"pnlMain")
SetColor( "pnl2",0,cYellow)
SetVisible( "pnl2",false)

AddPanel("pnl3",0,0,100%x,90%y,"pnlMain")
SetColor( "pnl3",0,cGreen)
SetVisible( "pnl3",false)

AddPanel("pnl4",0,0,100%x,90%y,"pnlMain")
SetColor( "pnl4",0,cBlue)
SetVisible( "pnl4",false)

AddPanel("pnl5",0,0,100%x,90%y,"pnlMain")
SetColor( "pnl5",0,cCyan)
SetVisible( "pnl5",false)

# ###################

AddPanel("pnlsel",0,90%y,20%x,10%y,"pnlMain")
SetColor( "pnlsel",0,cyellow)

AddButton("btn1",0,90%y,20%x,10%y,"pnlMain")
SetText("btn1","1" )

AddButton("btn2",20%x,90%y,20%x,10%y,"pnlMain")
SetText("btn2","2" )

AddButton("btn3",40%x,90%y,20%x,10%y,"pnlMain")
SetText("btn3","3" )

AddButton("btn4",60%x,90%y,20%x,10%y,"pnlMain")
SetText("btn4","4" )

AddButton("btn5",80%x,90%y,20%x,10%y,"pnlMain")
SetText("btn5","5" )

currentpage="pnl1"

Events
======
Sub Activity_Pause(UserClosed)
End Sub

Sub Activity_Resume
End Sub

Sub Button_Click(Who)
select who

case "btn1"

SetVisible( currentpage,false)
currentpage="pnl1"
SetVisible( currentpage,true)
Setleft("pnlsel",getleft("btn1"))

case "btn2"

SetVisible( currentpage,false)
currentpage="pnl2"
SetVisible( currentpage,true)
Setleft("pnlsel",getleft("btn2"))

case "btn3"

SetVisible( currentpage,false)
currentpage="pnl3"
SetVisible( currentpage,true)
Setleft("pnlsel",getleft("btn3"))

case "btn4"

SetVisible( currentpage,false)
currentpage="pnl4"
SetVisible( currentpage,true)
Setleft("pnlsel",getleft("btn4"))

case "btn5"

SetVisible( currentpage,false)
currentpage="pnl5"
SetVisible( currentpage,true)
Setleft("pnlsel",getleft("btn5"))

end select
End Sub
========

Friday, November 13, 2015

Animated Color LabelButton

Animated Color LabelButton

အရင္တေခါက္က User interaction နဲ႔ button click လုပ္တဲ့အခါ color/image ထည့္ထားရင္ animation ရေအာင္  timer သံုးၿပီး ေရးျပခဲ့ပါတယ္။ အခုတခါေတာ့ ဒီထက္ပိုေကာင္းတဲ့ Label  + activity_touch event ကိုသံုးၿပီး ေရးျပပါမယ္။

activity_touch(action,tx,ty) event မွာ action=0 က down, 1=up, နဲ႔ 2=drag ျဖစ္ပါတယ္။ tx နဲ႔ ty ကေတာ့ touch point ရဲ့ x နဲ႔ y တန္ဖိုးပါ။ tx နဲ႔ ty တန္ဖိုးေတြဟာ Label ရဲ့ အတိုင္းအတာ အတြင္းမွာ ရွိရင္ color ေျပာင္းျပၿပီး click တဲ့ ပံုစံမ်ိဳ း ျဖစ္ေအာင္ ေရးပါမယ္။

Views Panel
==========

AddPanel("pnl1",0,0,100%x,100%y,"")

AddLabel("lblbtn1",10%x,10%y,80%x,20%y,"pnl1")
SetColor( "lblbtn1",60,cyellow)
SetText("lblbtn1","Menu 1")
SetGravity("lblbtn1",17 )
x11=10%x
x12=90%x
y11=10%y
y12=30%y

AddLabel ("lblbtn2",10%x,40%y,80%x,20%y,"pnl1")
SetColor( "lblbtn2",60,cyellow)
SetText("lblbtn2","Menu 2")
SetGravity("lblbtn2",17 )
x21=10%x
x22=90%x
y21=40%y
y22=60%y

currentlblbtn=""

===========
Events Panel
===========

Sub Activity_Pause(UserClosed)
End Sub

Sub Activity_Resume
End Sub

sub activity_touch(action,tx,ty)
   
    select action

    case 0

        if (tx>x11) then
        if (tx<x12) then
        if (ty>y11) then
        if (ty<y12) then
       
            SetColor("lblbtn1",60,cgreen)
            invalidate("lblbtn1")
            currentlblbtn="lblbtn1"

        end if
        end if
        end if
        end if

        if (tx>x21) then
        if (tx<x22) then
        if (ty>y21) then
        if (ty<y22) then
       
            SetColor("lblbtn2",60,cgreen)
            invalidate("lblbtn2")
            currentlblbtn="lblbtn2"

        end if
        end if
        end if
        end if

    case 1

            SetColor(currentlblbtn,60,cyellow)
        invalidate(currentlblbtn)

        if currentlblbtn="lblbtn1" then
        MsgBox("You choose Menu1","")

        else if currentlblbtn ="lblbtn2" then
        MsgBox("You choose Menu2","")

    end if
    end select
end sub
================

Monday, November 9, 2015

ScrollView တြင္ image ၁၀ ပံု ထည့္ျပျခင္း

ScrollView တြင္ image ၁၀ ပံု  ထည့္ျပျခင္း

အခု project မွာေတာ့ scrollView တခုထဲမွာ image ၁၀ ပံု ထည့္ျပဖို႔ ေရးပါမယ္။ Image ေတြကို အလ်ား၊ အနံ အခ်ိဳ း 4:3 နဲ႔ ညီတူ ေဖာ္ျပမွာ ျဖစ္လို႔၊ ကန္႔လန္႔ပံု ၁၀ ပံုကို 4:3 အခ်ိဳ းနဲ႔ ျပင္ဆင္ထားပါ။ ၿပီးရင္ BMP မွာ AddFiles နဲ႔ ထည့္ပါ။ (img1.png, img2.png, ..., img10.png)

Views Panel
==========

AddScrollView("scr",0,0,100%x,100%y,"")
GetPanel("scr","pnlScr")

AddPanel("pnl1",0,0,100%x,75%x,"pnlScr")
BitmapInit(DirAssets,"img1.png")
SetBackgroundImage("pnl1")

AddPanel("pnl2",0,75%x,100%x,75%x,"pnlScr")
BitmapInit(DirAssets,"img2.png")
SetBackgroundImage("pnl2")

AddPanel("pnl3",0,150%x,100%x,75%x,"pnlScr")
BitmapInit(DirAssets,"img3.png")
SetBackgroundImage("pnl3")

AddPanel("pnl4",0,225%x,100%x,75%x,"pnlScr")
BitmapInit(DirAssets,"img4.png")
SetBackgroundImage("pnl4")

AddPanel("pnl5",0,300%x,100%x,75%x,"pnlScr")
BitmapInit(DirAssets,"img5.png")
SetBackgroundImage("pnl5")

AddPanel("pnl6",0,375%x,100%x,75%x,"pnlScr")
BitmapInit(DirAssets,"img6.png")
SetBackgroundImage("pnl6")

AddPanel("pnl7",0,450%x,100%x,75%x,"pnlScr")
BitmapInit(DirAssets,"img7.png")
SetBackgroundImage("pnl7")

AddPanel("pnl8",0,525%x,100%x,75%x,"pnlScr")
BitmapInit(DirAssets,"img8.png")
SetBackgroundImage("pnl8")

AddPanel("pnl9",0,600%x,100%x,75%x,"pnlScr")
BitmapInit(DirAssets,"img9.png")
SetBackgroundImage("pnl9")

AddPanel("pnl10",0,675%x,100%x,75%x,"pnlScr")
BitmapInit(DirAssets,"img10.png")
SetBackgroundImage("pnl10")

SetHeight("pnlScr",750%x)

================

No codes for Events Panel

================

ပံု တခုနဲ႔ တခုၾကားမွာ 5%x gap ထည့္ၾကည့္ပါ။

Sunday, November 8, 2015

Sliding Drawer Menu

Sliding Drawer Menu

အရင္ တေခါက္က menu button ႏွိပ္လိုက္ရင္ menu panel ေလး တခု ထြက္လာေအာင္ timer သံုးၿပီး ေရးျပခဲ့ပါတယ္။ အခုတခါေတာ့ menu panel ကို လက္နဲ႔ drag ဆြဲထုတ္ရတဲ့ Sliding Drawer Menu တခု ေရးျပပါမယ္။

# Views Panel
# #########

in=-50%x+50
Visible=50
pwidth=50%x

# ###########

AddPanel("pnlMain",0,0,100%x,100%y,"")

AddPanel("pnlPage1",50,0,100%x-50,100%y,"pnlMain")
SetColor("pnlPage1",0,cgreen)

AddPanel("pnlPage2",50,0,100%x-50,100%y,"pnlMain")
SetColor("pnlPage2",0,cyellow)

AddPanel("pnlPage3",50,0,100%x-50,100%y,"pnlMain")
SetColor("pnlPage3",0,cred)

SetVisible("pnlPage2",false)
SetVisible("pnlPage3",false)

# ##########

AddPanel("pnlDrawer",in,0,pwidth,100%y,"")
SetColor("pnlDrawer",0,cblue)
AddLabel("lbl1",10,100,300,100,"pnlDrawer")
SetText("lbl1","Select page")
AddButton("btn1",10,200,300,100,"pnlDrawer")
SetText("btn1","Page1")

AddButton("btn2",10,300,300,100,"pnlDrawer")
SetText("btn2","Page2")

AddButton("btn3",10,400,300,100,"pnlDrawer")
SetText("btn3","Page3")

# ##########

dx=0
dy=0
x=0
y=0
draggable=false
oldl=in
newl=0
currentpage="pnlPage1"

# Events Panel
# ###########
Sub Activity_Pause(UserClosed)
End Sub

Sub Activity_Resume
End Sub

sub activity_touch(action,tx,ty)

select action

case 0
if tx< Visible then
draggable=true
dx=tx
end if

case 1
draggable=false

case 2
if draggable=true then
oldl=getleft("pnlDrawer")
newl=oldl+tx-dx
if newl>0 then
newl=0
end if
if newl<in then
newl=in
end if
Visible=pwidth-newl
Setleft("pnlDrawer",newl)

end if

end select

end sub

Sub Button_Click(Who)
select who

case "btn1"
SetVisible( currentpage,false)
SetVisible( "pnlPage1",true)
currentpage="pnlPage1"

case "btn2"

SetVisible( currentpage,false)
SetVisible( "pnlPage2",true)
currentpage="pnlPage2"

case "btn3"

SetVisible( currentpage,false)
SetVisible( "pnlPage3",true)
currentpage="pnlPage3"

end select
End Sub
# #########

Sliding Menu ျဖင့္ Panels (pages) ေျပာင္းျပျခင္း

Sliding Menu ျဖင့္ Panels (pages) ေျပာင္းျပျခင္း

Sliding Menu ကို အရင္ project မွာ ေရးျပခဲ့ပါၿပီ။ အခု project မွာေတာ့ menu panel ေပၚက button ေတြကို ႏွိပ္လိုက္ရင္ သက္ဆိုင္ရာ panel (page) ေတြကို ေျပာင္းျပႏိုင္ေအာင္ ဖန္တီးပါမယ္။

===========
Views Panel
===========

x1=-50%x
SetTimerInterval(1)
hidden=true

AddPanel("pnlMain",0,0,100%x,100%y,"")
AddLabel("lbl",0,0,100%x,100%y,"pnlMain")

AddPanel("pnlMenu",x1,0,50%x,100%y,"")

SetColor( "pnlMenu",0,cblue)
AddButton("btn1",22,160,266,119,"pnlMenu")
SetText( "btn1","Page 1")

AddButton("btn2",29,310,258,106,"pnlMenu")
SetText( "btn2","Page 2")

AddButton("btn3",36,450,254,117,"pnlMenu")
SetText( "btn3","Page 3")

AddPanel("p1",0,0,100%x,100%y,"pnlMain")
SetColor("p1",0,cGreen)

AddPanel("p2",0,0,100%x,100%y,"pnlMain")
SetColor("p2",0,cYellow)

AddPanel("p3",0,0,100%x,100%y,"pnlMain")
SetColor("p3",0,cRed)

current="p1"
SetVisible("p2",false)
SetVisible("p3",false)

===========
Events Panel
===========
Sub Activity_Pause(UserClosed)
End Sub

Sub Activity_Resume
End Sub

sub activity_keypress(key)
if key=4 then
if hidden=false then
SetTimerEnabled(true)
else
    activityfinish
end if
end if

if key=82 then
SetTimerEnabled(true)
end if
end sub

Sub Timer_Tick

if hidden=true then

x1=x1+10

if x1>=0 then
x1=0
hidden=false
SetTimerEnabled(false )
end if

else

x1=x1-10

if x1<=-50%x then
x1=-50%x
hidden=true
SetTimerEnabled(false)
end if

end if

Setleft("pnlMenu",x1)
Setleft("pnlMain",x1+50%x)

End Sub

Sub Button_Click(Who)

SetTimerEnabled(true)

select Who

case "btn1"
SetVisible(current,false)
SetVisible("p1",true)
current="p1"

case "btn2"
SetVisible(current,false)
SetVisible("p2",true)
current="p2"

case "btn3"
SetVisible(current,false)
SetVisible("p3",true)
current="p3"

end select

End Sub

===========

Saturday, November 7, 2015

Slide menu တခု ေရးၾကမယ္

Slide menu တခု ေရးၾကမယ္

phone ရဲ့ menu button ကို ႏွိပ္လိုက္ရင္ menu panel ေလး တခု ဘယ္ဘက္က ေလွ်ာၿပီး ထြက္လာေအာင္ လုပ္ပါမယ္။ menu button ကို ထပ္ႏွိပ္ရင္၊ ဒါမွ မဟုတ္ back button ကို ႏွိပ္လိုက္ရင္၊ menu item တခုကို ႏွိပ္လိုက္ရင္ ျပန္ပိတ္သြားေအာင္ ေရးပါမယ္။ menu panel ထြက္လာခ်ိန္မွာ main panel ကို ညာဘက္ကို တြန္းထုတ္သြားမွာပါ။

========
View Panel
=========
x1=-50%x
SetTimerInterval(1)
hidden=true

AddPanel("pnl1",0,0,100%x,100%y,"")
AddLabel("lbl",0,0,100%x,100%y,"pnl1")
SetText("lbl","This is main activity")

AddPanel("pnl2",x1,0,50%x,100%y,"")

SetColor( "pnl2",0,cblue)
AddButton("btn1",22,160,266,119,"pnl2")
SetText( "btn1","Menu 1")
AddButton("btn2",29,310,258,106,"pnl2")
SetText( "btn2","Menu 2")
AddButton("btn3",36,450,254,117,"pnl2")
SetText( "btn3","Menu 3")

=============
Events Panel
=============

Sub Activity_Pause(UserClosed)
End Sub

Sub Activity_Resume
End Sub

sub activity_keypress(key)
if key=4 then
if hidden=false then
SetTimerEnabled(true)
else
activityfinish
end if
end if

if key=82 then
SetTimerEnabled(true)
end if
end sub

Sub Timer_Tick

if hidden=true then

x1=x1+10

if x1>=0 then
x1=0
hidden=false
SetTimerEnabled(false )
end if

else

x1=x1-10

if x1<=-50%x then
x1=-50%x
hidden=true
SetTimerEnabled(false)
end if

end if

Setleft("pnl2",x1)
Setleft("pnl1",x1+50%x)

End Sub

Sub Button_Click(Who)
MsgBox("Menu Button clicked","")
SetTimerEnabled( true)
End Sub
===========

Friday, November 6, 2015

Animated Button

Animated Button

Button တခုကို color ထည့္လိုက္ရင္ ျဖစ္ျဖစ္၊ background image ထည့္လိုက္ရင္ ျဖစ္ျဖစ္၊ အဲဒီ button ကို click တဲ့အခါ animation မရေတာ့ပဲ ပံုေသႀကီး ျဖစ္သြားပါတယ္။

အခု project မွာ button ကို click လိုက္ခ်ိန္မွာ color ေလး ေျပာင္းျပေအာင္ timer နဲ႔ animate လုပ္ျပထားပါတယ္။

ဒါကို နည္းယူၿပီး color နဲ႔ မဟုတ္ပဲ background image ေလးေျပာင္းျပေအာင္ animate လုပ္ၾကည့္ဖို႔ ေလ့က်င့္ခန္း ေပးလိုက္ပါတယ္။

=========
Views Panel
=========
ColorRelease=cYellow
ColorPress=cGreen
pressedButton=""
SetTimerInterval(100)

AddButton("btn1",10%x,10%y,80%x,10%y,"")
SetColor("btn1",20,ColorRelease)
SetText( "btn1","Click me")

=============
Events Panel
=============
Sub Activity_Pause(UserClosed)
End Sub

Sub Activity_Resume
End Sub

Sub Button_Click(who)

Timer_tick
pressedButton=who
SetTimerEnabled(true )
SetColor(pressedButton,20,ColorPress)

# MsgBox("Button clicked",who)

End Sub

Sub Timer_Tick
SetTimerEnabled( false)
SetColor(pressedButton,20,ColorRelease)
End Sub

=========

Thursday, November 5, 2015

ပံုျပင္ (၁၀) ပုဒ္ ပါတဲ့ apk တခု ေရးမယ္

ပံုျပင္ (၁၀) ပုဒ္ ပါတဲ့ apk တခု ေရးမယ္
===========================

ဒီ project က ပံုျပင္ ၁၀ ပုဒ္ ေခါင္းစဥ္ေတြကို listView နဲ႔ ေဖာ္ျပထားၿပီး item တခုကို ေရြးလိုက္ရင္ သက္ဆိုင္ရာ ပံုျပင္ကို ဖတ္လို႔ ရေအာင္ ေရးျပထားပါတယ္။

၁။ ပံုျပင္ေတြကို sample0.txt, sample1.txt, ..., sample10.txt ဆိုၿပီး ေရးသား ဖန္တီးထားပါ။

၂။ အဲဒီ ဖိုင္ေတြကို AddFiles နဲ႔ BMP မွာ ထည့္ပါ။

၃။ ေအာက္က code ေတြကို ေရးပါ။

# Views Panel

SetActivityTitle("Story book")

AddPanel("pnlMain",0,0,100%x,100%y,"")

AddListView("lv1",0,0,100%x,100%y,"pnlMain")

Add("lv1","Story 1")
Add("lv1","Story 2")
Add("lv1","Story 3")
Add("lv1","Story 4")
Add("lv1","Story 5")
Add("lv1","Story 6")
Add("lv1","Story 7")
Add("lv1","Story 8")
Add("lv1","Story 9")
Add("lv1","Story 10")

Reading=false

AddPanel("pnl1",0,0,100%x,100%y,"")
SetVisible("pnl1",false)
AddscrollView("scr1",0,0,100%x,100%y,"pnl1")
getPanel("scr1","pnl2")

Setheight("pnl2",200%y)

# If all Text  not Visible,
# increase height
# eg, Setheight("pnl2",600%y)
# eg, AddLabel ("lbl1",0,0, 100%x, 600%y, "pnl2")

AddLabel("lbl1",0,0,100%x,200%y,"pnl2")

# ##############

# Events Panel

Sub Activity_Pause(UserClosed)
End Sub

Sub Activity_Resume
End Sub

# ###############

sub Activity_keypress(key)

if key=4 then
if Reading=true then

SetVisible("pnl1",false)
SetVisible("pnlMain",true)
Reading=false

else
activityfinish
end if
end if

end sub

# ######################

Sub ListView_ItemClick(who, pos, value)
select pos
case 0
str=FileReadString(DirAssets,"sample0.txt")
case 1
str=FileReadString(DirAssets,"sample1.txt")
case 2
str=FileReadString(DirAssets,"sample2.txt")
case 3
str=FileReadString(DirAssets,"sample3.txt")
case 4
str=FileReadString(DirAssets,"sample4.txt")
case 5
str=FileReadString(DirAssets,"sample5.txt")
case 6
str=FileReadString(DirAssets,"sample6.txt")
case 7
str=FileReadString(DirAssets,"sample7.txt")
case 8
str=FileReadString(DirAssets,"sample8.txt")
case 9
str=FileReadString(DirAssets,"sample9.txt")

end select

SetText("lbl1",str)
SetVisible("pnl1",true)
SetVisible("pnlMain",false)
Reading=true

End Sub

# ###############

၄။ Text ေတြကို အျပည့္ ဖတ္လို႔ မရရင္ pnl2 နဲ႔ lbl1 ရဲ့ height ေတြကို တိုးေပးပါ။

# If all Text  not Visible,
# increase height
# eg, Setheight("pnl2",600%y)
# eg, AddLabel ("lbl1",0,0, 100%x, 600%y, "pnl2")

၅။ ပံုျပင္ မဟုတ္ပဲ အျခား အေၾကာင္းအရာ ေတြကိုလည္း ေရးသားႏိုင္ပါတယ္။

Monday, November 2, 2015

Expandable Buttons

Expandable Buttons

ဒီနမူနာ program ကေတာ့ Button ေတြထဲက တခုကို ႏွိပ္လိုက္ရင္ အဲဒီ button နဲ႔ ဆိုင္တဲ့ information ေတြကို button ေအာက္တည့္တည့္မွာ label တခု ၾကားထိုးၿပီး ေဖာ္ျပတဲ့နည္း ျဖစ္ပါတယ္။

===========
Views Panel
===========

AddPanel("pnl1",0,0,100%x,100%y,"")

AddscrollView("scr1", 0,0,100%x,100%y ,"pnl1")
getPanel("scr1","pnl2")

AddButton("btn1",0,0,100%x,25%y,"pnl2")
SetText("btn1","Button 1")
AddButton("btn2", 0,25%y,100%x,25%y,"pnl2")
SetText("btn2","Button 2")
AddButton("btn3", 0,50%y,100%x,25%y,"pnl2")
SetText("btn3","Button 3")
AddButton("btn4", 0,75%y,100%x,25%y,"pnl2")
SetText("btn4","Button 4")

# Info Label to Show when Button clicked

AddLabel("lbl1", 0,0,100%x,25%y,"pnl2")
SetVisible("lbl1",false )

# initial Settings

Setheight("pnl2",100%y)

stateOpen=0

# informations

info1="info when butt 1 is pressed"
info2="info when butt 2 is pressed"
info3="info when butt 3 is pressed"
info4="info when butt 4 is pressed"

===========
Events Panel
===========
Sub Activity_Pause(UserClosed)
End Sub

Sub Activity_Resume
End Sub

# ###################
Sub Button_Click(Who)

select who

case "btn1"

if stateOpen=1 then

stateOpen=0
displayInfo(0)

else

stateOpen=1
displayInfo(1)

end if

case "btn2"
if stateOpen=2 then

stateOpen=0
displayInfo(0)

else

stateOpen=2
displayInfo(2)

end if

case "btn3"
if stateOpen=3 then

stateOpen=0
displayInfo(0)

else

stateOpen=3
displayInfo(3)

end if

case "btn4"
if stateOpen=4 then

stateOpen=0
displayInfo(0)

else

stateOpen=4
displayInfo(4)

end if

end select
End Sub

# ###############

sub displayInfo(n)

select n

case 0

Setheight("pnl2",100%y)
Settop("btn2",25%y)
Settop("btn3",50%y)
Settop("btn4",75%y)
SetVisible("lbl1",false)

case 1

Setheight("pnl2",125%y)
Settop("lbl1",25%y)
Settop("btn2",50%y)
Settop("btn3",75%y)
Settop("btn4",100%y)
SetVisible("lbl1",true)
SetText("lbl1",info1)

case 2

Setheight("pnl2",125%y)
Settop("lbl1",50%y)
Settop("btn2",25%y)
Settop("btn3",75%y)
Settop("btn4",100%y)
SetVisible("lbl1",true)
SetText("lbl1",info2)

case 3

Setheight("pnl2",125%y)
Settop("lbl1",75%y)
Settop("btn2",25%y)
Settop("btn3",50%y)
Settop("btn4",100%y)
SetVisible("lbl1",true)
SetText("lbl1",info3)

case 4

Setheight("pnl2",125%y)
Settop("lbl1",100%y)
Settop("btn2",25%y)
Settop("btn3",50%y)
Settop("btn4",75%y)
SetVisible("lbl1",true)
SetText("lbl1",info4)

end select

end sub

# ##########

Sunday, November 1, 2015

Music Player

Music Player တခု ေရးၾကမယ္

သီခ်င္း ၁၀ ပုဒ္ပါတဲ့ Music Player တခု ေရးပါမယ္။ ကိုယ္ထည့္မဲ့ music file ေတြကို ရိုးရွင္းတဲ့ english name ေျပာင္းထားပါ။ ၿပီးရင္ BMP AddFiles ကေန add လုပ္ထားပါ။ အခု နမူနာမွာေတာ့ music1.mp3 ... music10.mp3 ျဖစ္ပါတယ္။ music ဖိုင္ကို ေရြးခ်ယ္ဖို႔ listView ကို သံုးပါမယ္။ play, pause, stop အတြက္ button ၃ခု သံုးထားပါတယ္။ listView မွာ သီခ်င္း ေရြးလိုက္ရင္၊ play/pause/stop ႏွိပ္ရင္ ထိပ္ဆံုးက label မွာ info display လုပ္မွာပါ။

Version 2.0 မွာ တပုဒ္ခ်င္း ပဲ play လုပ္ႏိုင္ပါဦးမယ္။ version 2.1  က်မွ playlist ကို ဆက္တိုက္ play ႏိုင္မွာပါ။

=============
Views Panel
=============

AddLabel("lbl1",0,97,719,225,"")
SetText("lbl1","music1.mp3 : Stopped")

AddListView("lv1",0,340,720,628,"")

AddButton("btn1",19,988,210,118,"")
SetText("btn1","Play")
AddButton("btn2",268,990,212,114,"")
SetText("btn2","Pause")
AddButton("btn3",506,991,203,111,"")
SetText("btn3","Stop")

FileCopy(DirAssets,"music1.mp3",DirStorage,"music1.mp3")
Add("lv1","music1.mp3")

FileCopy(DirAssets,"music2.mp3",DirStorage,"music2.mp3")
Add("lv1","music2.mp3")

FileCopy(DirAssets,"music3.mp3",DirStorage,"music3.mp3")
Add("lv1","music3.mp3")

FileCopy(DirAssets,"music4.mp3",DirStorage,"music4.mp3")
Add("lv1","music4.mp3")

FileCopy(DirAssets,"music5.mp3",DirStorage,"music5.mp3")
Add("lv1","music5.mp3")

FileCopy(DirAssets,"music6.mp3",DirStorage,"music6.mp3")
Add("lv1","music6.mp3")

FileCopy(DirAssets,"music7.mp3",DirStorage,"music7.mp3")
Add("lv1","music7.mp3")

FileCopy(DirAssets,"music8.mp3",DirStorage,"music8.mp3")
Add("lv1","music8.mp3")

FileCopy(DirAssets,"music9.mp3",DirStorage,"music9.mp3")
Add("lv1","music9.mp3")

FileCopy(DirAssets,"music10.mp3",DirStorage,"music10.mp3")
Add("lv1","music10.mp3")

LoadAudioFile(DirStorage,"music1.mp3")
song="music1.mp3"

============
Events Panel
============
Sub Activity_Pause(UserClosed)
pauseaudio
SetText("lbl1",song & " : Paused")
End Sub

Sub Activity_Resume
End Sub

Sub ListView_ItemClick(who, pos, value)
stopaudio
song=value
LoadAudioFile(DirStorage,song)
SetText("lbl1",song & " : Playing")
playaudio
End Sub

Sub Button_Click(Who)
select who
case "btn1"
playaudio
SetText("lbl1",song & " : Playing ...")
case "btn2"
pauseaudio
SetText("lbl1",song & " : Paused")
case "btn3"
SetText("lbl1",song & " : Stopped")
stopaudio
end select
End Sub

==============

Text File Reader

Text File Reader တခု ေရးၾကမယ္

===============
Views Panel
===============

AddPanel("pnlMain",0,0,100%x,100%y,"")
AddButton("btn1",10%x,10%y,80%x,10%y,"pnlMain")
SetText("btn1","Read Text File")
Reading=false

AddPanel("pnl1",0,0,100%x,100%y,"")
SetVisible("pnl1",false)
AddscrollView("scr1",0,0,100%x,100%y,"pnl1")
getPanel("scr1","pnl2")
Setheight("pnl2",200%y)
AddLabel("lbl1",0,0,100%x,200%y,"pnl2")

===============
Events Panel
===============
Sub Activity_Pause(UserClosed)
End Sub

Sub Activity_Resume
End Sub

Sub Button_Click(Who)

str=FileReadString(FileDirRootExternal,"sample.txt")
SetText("lbl1",str)
SetVisible("pnl1",true)
SetVisible("pnlMain",false)
Reading=true

End Sub

sub Activity_keypress(key)

if key=4 then
if Reading=true then

SetVisible("pnl1",false)
SetVisible("pnlMain",true)
Reading=false

else
activityfinish
end if
end if

end sub

===============